Rain Dance

Wouldn’t you like to dance in the rain without getting wet? Getting caught in the rain can be refreshing in the summer, but listen, it’s October now and everyone is getting the sniffles, myself included. Introducing… Rain Dance.

CONCEPT
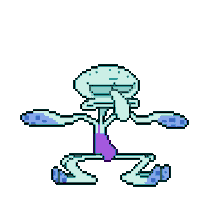
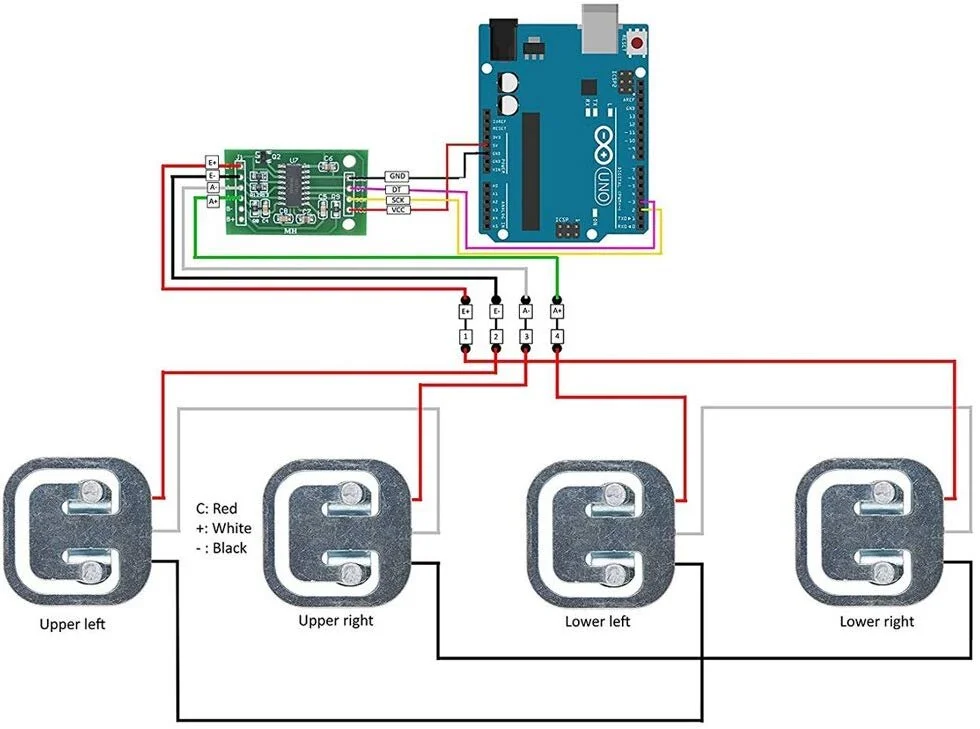
Rain Dance is an interactive installation that will project a raining scene with the silhouette of the viewer in the middle. This body tracking silhouette will have superimposed randomized GIFs of dancing feet that will become activated once the user is in front of the camera in the correct location and stepping on load sensors that are connected to an Arduino. A 30” circular pool of water will be placed directly underneath the projected image of the feet. Sound exciters will be attached to the bottom of the pool, and when a user is moving their feet, a sound will be triggered causing the water to vibrate.

IMG_3975.jpg

VISUALIZATION PROTOTYPE: p5.js

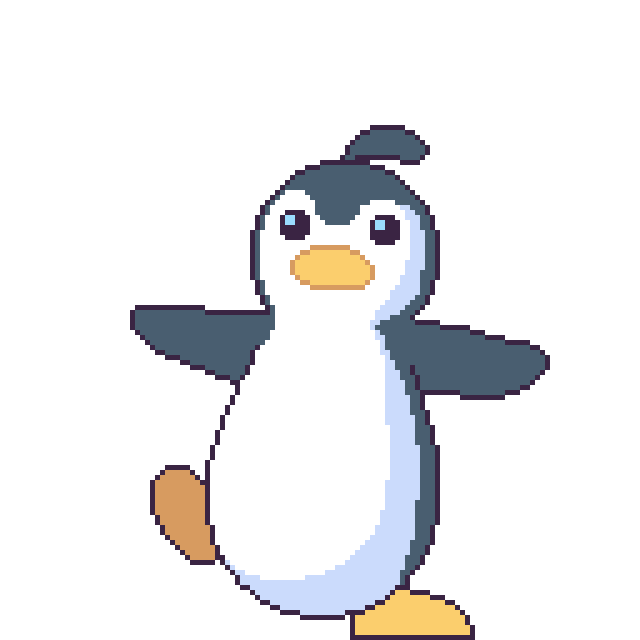
I wanted to create the raining scene with p5.js using a randomized array of raindrops, but how can I tackle the randomized GIF of dancing feet that would splash around this scene? The idea is that the load sensor would detect a set minimum weight and trigger a GIF to appear. I envisioned pulling an image URL from an API, but I had difficulty with the getting the syntax just right.

I followed Shiffman’s Working with APIs in Javascript tutorial, and I was successful in calling specific parameters to point to the correct GIF URL.After some more perusing, I found another relevant Shiffman tutorial: The Giphy API and Javascript. Here is a link to my sketch following the tutorial with the GIF correctly loading. In the example however, Shiffman populates the GIFs into a list, and does not confine it within a canvas. If I create a canvas, the GIF appears outside of the canvas. I tried the push, pop, and translate functions within the function where I createImg() to see if I can shift the GIF to where I want it, and did not find any success.

I decided I would create an array of saved GIFs. I thought it might be as straightforward as loading images, but I quickly realized that this was not the case. Branching off the rotating cat example, I replaced the kitty with a GIF and saw that the positioning of the GIF was static and would not generate a GIF when I clicked the mouse. What is the best way to create an array of GIFs?

I came across Lauren McCarthy’s now closed request for adding GIF support to the image() function and also this thread in StackOverflow. . The following libraries handle GIFs:

My sketch using p5.gif.js did not work - I received these errors: Uncaught ReferenceError: loadGif is not defined (: line 12), Uncaught TypeError: Cannot read property 'loaded' of undefined (: line 21)
My sketch using p5.gif worked, but it took forever to load a very simple GIF, and I still did not understand how to shift where the GIF would be positioned.
The p5.createLoop looked more like it focused on creating GIFs within the p5 environment, and that “add draw option to stay in sync with GIF loop” is still on the to-do list.

Interacting with the Arduino

Now that I have a p5js sketch to work with, I can use an Arduino to communicate with the sketch via Serial. Using load sensors, I plan on using two load cells that will measure the weight of the left foot, and the other two for the right foot. When a user leans left or right on the load cells, they would change the X position of the GIF at a mapped value. Because I am still waiting for my load cell amplifier that will combine the readings from the four load cells, I decided to use a potentiometer in its place. The potentiometer is mapped to the width of the canvas so that the GIF can be shifted when its values are changed.

raindancegif.gif
61T98cbhG6L._AC_SL1001_.jpg
Wheatstone_Bridge_Load_Sensor_bb_Fritzing.jpg

Exploring Sound with Arduino

IMG_1347.jpg

I was able to get a hold of multiple discarded speakers from the back of a television and thought “Well hey, I know how to put these to good use.”

The left and right speakers each have 4 pins that are connected to a single 8 pin connector. It’s easy to identify which wires go to which since they are grouped together and color coded. I wanted to test both of their functionality.

I decided to upload Fur Elise to my Arduino using the code posted here .

If I wanted one note to play on one speaker and then switch to the next speaker, I would have to manually write out each note. Just as a demonstration, I manually switched the hook-up wire back and forth in the same pin on the Arduino.

Here is a video demonstrating the functionality of both speakers.


Observation: Taco Bell's Self-Service Kiosk

The other day, I listened to this episode of the podcast Hidden Brain - You 2.0: Decide Already! and I thought that I could apply it to the lesson I learned observing a public interactive technology.

When you’ve made an irrevocable decision, you rationalize it. Once something’s gone and gone forever, the mind gets to work figuring out why what it got is really better than what it lost.

But when a decision isn’t irrevocable, when you can remake it, and revisit it and change your mind any time, what do you do? You just ruminate about it, right? You buy a sweater, and you know you can take it back any time. And every time you put it on, you look in the mirror and you think, oh, I don’t know. Maybe it’s not a good fit. Maybe it’s not a good color. Maybe I ought to bring it back. On the other hand, if this sweater was bought at a place that won’t take it back, you look in the mirror and you say, gosh, that looks good.
— Daniel Gilbert, Psychologist. Source: NPR.org

This week, I wanted to observe people using the Taco Bell’s self-service kiosk. I made the assumption that people gravitate towards the kiosk to steer away from human interaction and preserve anonymity, maybe to avoid the shame of ordering way too much food after being presented all of the available options. The line for the kiosk might look shorter at times, but it doesn’t necessarily mean you will get your food any faster. There might be the thought that using this technology would be much more efficient, resulting in a quicker transaction. I find that when I use it, I discover new ways of customizing the order, thus taking a much longer time to use it, and I order much more than I originally intended. There are so many different pages of the menu to navigate through, the amount of options becomes way too overwhelming, and after experiencing decision fatigue, I pick things “just to get it over with.”

I went to Taco Bell at what I thought was a prime lunch hour, 12:30 - 1:15pm. I sat at the table closest to the kiosk with the best viewing angle of the touch screen so that I would be in a prime location for observing other customers using at least 1 of 2 kiosks.

To my surprise, no one completed a full transaction at the kiosk in my 45 minute visit. Regardless of a 5-6 person line, all of the guests walked right past the kiosk and straight to the cashiers. One person started to flip through the menu and spent 56 seconds navigating before he sort of shook his head and went back to staring at the menus above the cashiers.

IMG_3675.JPG
IMG_3677.PNG

My observation of the self-service kiosk will be based on my own roughly 4-minute transaction from start to finish. The part that took the most time was deciding how to customize an item after the very long process of finding that item. In my case, I flipped through each menu to find the new Toasted Cheddar Chalupa. I was very unfamiliar with all of the ways you could customize the taco, simply fascinated with all of these sauces I never knew were available or even already included in things that I’ve eaten there several times. For my value menu nachos, I was unaware that the sauce that was included was dubbed “red sauce” - what even is that? I added the “popular add-ons:” seasoned beef, tomatoes, onions, and reduced fat sour cream.

The part that took the least amount of time was the first binary question: the decision to dine in or take out at the very beginning. The other seemingly straightforward question within the transaction was choosing a method of payment, but it had three separate screen interactions. It asked me how I would like to pay and I selected Cash, however it then prompted me to rethink my decision by stating that cash payments are made at the front counter. Perhaps by principle, I wanted to avoid the counter and complete the transaction entirely at the kiosk. After selecting debit card, it then activated the adjacent card reader and I proceeded to insert my chip. I then opted to receive my receipt via text.

Even though I completed my transaction at the kiosk, there was still confusion of which order belonged to whom. The employee called my name, and the tray I received contained a burrito and a hard taco instead of the chalupa and nachos I ordered. No matter where you order it, whether it is at the cashier, kiosk, or online, it falls within the same mix of orders and can just as easily be mistaken with another customer.

What I learned was that people are much more likely to approach the counter because of its quicker transaction as a result of withholding all of the available options in front of you. It’s not the most important decision you have to make when all of the food you order is affordable - there isn’t too much to lose if you make the “wrong” choice. Reflecting on the quote at the beginning of this blog led me to think that people are much more happy making a final decision and receiving closure when a human hands you the receipt to end the transaction. I believe that the self-service kiosk can be helpful for those with specific dietary restrictions, or are very particular and familiar with all of the ways an item can be customized.

IMG_3667.JPG

Analog Input / Output

To demonstrate an analog input / output, I wanted to use an ultrasonic distance sensor and map its values to the angle of a servo motor. With this very simple configuration, I used it to create a wave generator.

To elevate the idea, I wanted there to be two servos on either side of the water channel so that the waves can collide.

Screen Shot 2019-09-21 at 6.35.55 PM.png


Make a Switch: ITP-linko!

For this assignment, we were tasked to create a switch. Introducing…

Completed ITPlinko circuit

Completed ITPlinko circuit


ITP-linko!
Drop a quarter at the top - you might just be the next winner! In order to activate the white LED strip at the bottom, the quarter must drop into the winning slot to complete the circuit.


ITPlinko Materials:

IMG_3573.jpg
  • Found wood

  • 1-1/2” nails

  • Battery pack

  • (3) AA Batteries

  • LED Strip

  • Aluminum Foil

  • Quarter


Process:

  1. Gather wood and trim to size

  2. Drill pilot holes in wood and screw in side and bottom borders

  3. Map out nail placement in game board

  4. Hammer in nails to create the quarter’s obstacle course

  5. Connect battery pack’s ground wire to ground of LED strip.

  6. Create foil sections that will need to be connected in order to act as a switch to complete the circuit.

  7. Connect battery pack’s power wire to one foil section. Connect other foil section to LED strip’s power contact.

  8. Turn on battery and drop in your quarter!


switch01.gif