Vortex

For my final Design for Digital Fabrication project, I created a singular prototype for what I envision for Vortex.

In this prototype, audio-reactive LEDs driven by madMapper are embedded within an aluminum channel. This entire channel spins continuously via a NEMA23 motor mounted to a modular base, controlled by an Arduino.

Using Fusion360, I created a simulation of what 5 of these bars positioned in a pentagonal form would look like.

It was difficult purchasing perfectly mating parts for the mechanical connection between the LEDs to the motor. I purchased a 12mm shaft hub, a 1/2” ID slip ring, and a 1/4” coupler for the NEMA23. This called for a custom shaft, which Ben Light helped me make on the metal lathe. We started off with a 1” aluminum round stock, and very meticulously shaved it down to the appropriate widths for each component.

IMG_3212.jpg

Here is a quick time lapse of some manual fabrication necessary for the mechanical connections.

Here is the Fusion360 rendering of the project.

vortex.PNG

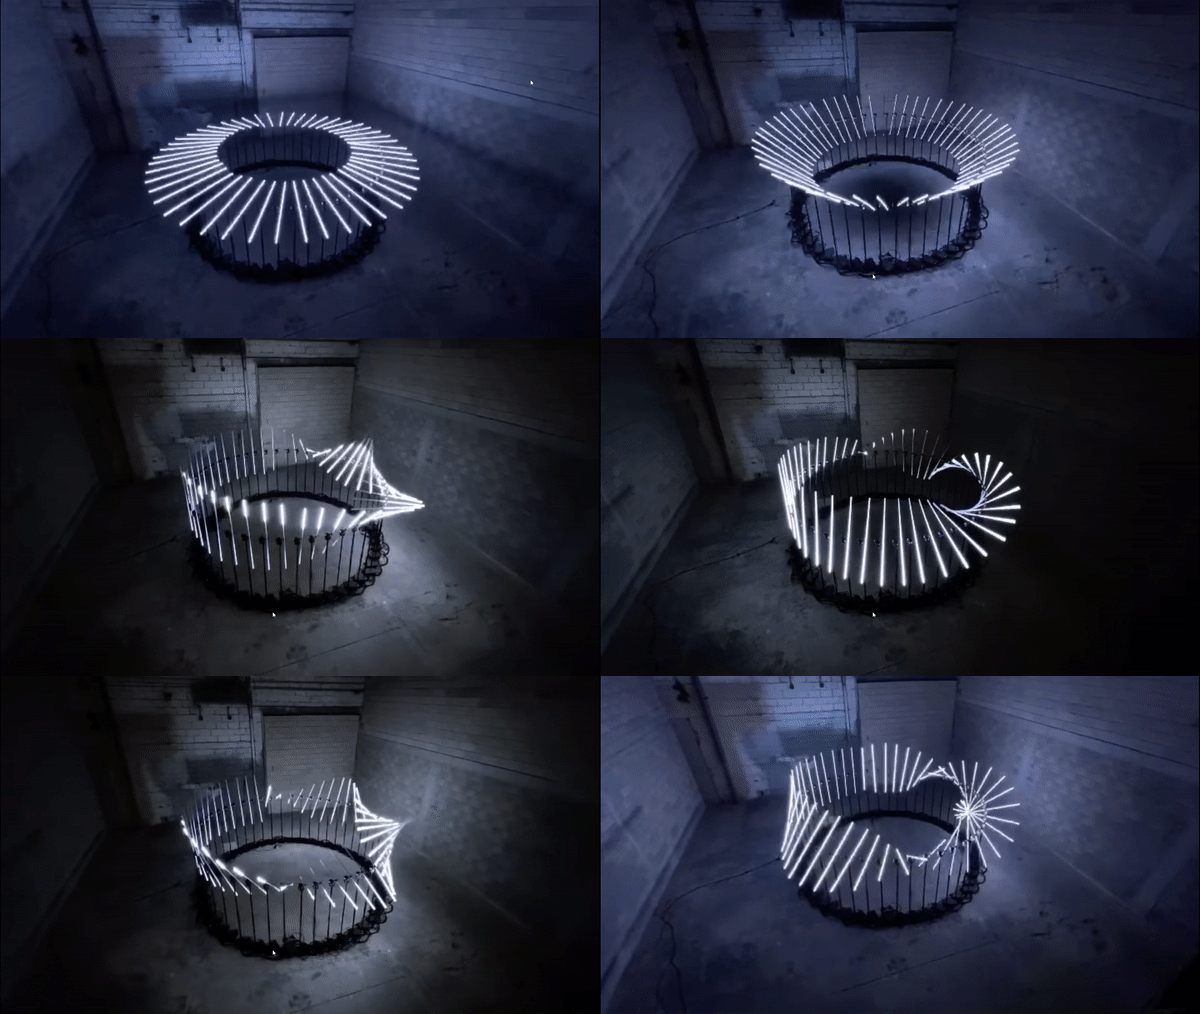
This project was inspired by collectifscale’s project Flux.

flux1.gif

Project Development

After digesting everyone’s feedback, I feel that my original proposal had a conflict between the concept and the physical design. I can see it manifest in two entirely different projects, and forcing the two together feels counterproductive.

I am still playing around with a few ideas.

Mechanical Iris Gazebo

When thinking about a public art piece where people can set their intentions, say their prayers, and remember loved ones, I wanted to create a dedicated place for this. I started thinking about the vertical elements of vaulted ceilings, specifically muqarnas of mosques and rib-vaults of gothic cathedrals. Looking up at these architectural elements, I’ve always imagined them opening up a portal into the sky, allowing the spirit to transcend into the heavens. I’m very fond of Gaudi’s hyperbolic paraboloids found in the Sagrada Familia in Barcelona, the muqarnas found in Alhambra Palace in Granada, and Michael Hansmeyer’s interpretation titled Muqarna Mutation.

the-sagrada_familia_ceiling.jpg
alhambra.jpg
Muqarna-Mutation2.jpg
Muqarna-Mutation-Collater.al-5-1024x640.jpg

I reflected more on the idea of transcendence and transformation, and wanted the ceiling to open up to the sky. I looked more into mechanical irises, and came across this example: The Tree of Prosperity in the Wynn Macau.

treeprosperity.gif
Iris-large-resized.jpg


There’s a whole bunch of 3D models of mechanical irises / apertures that can be 3D printed, cut out of cardboard, etc. I came across this wonderful tutorial by Caleb Kraft and CNC Router Parts that included the Fusion360 files, complete with CAD / CAM / animations for both a 24” desktop and a full size 48” version.

iris.gif
irisf3d.gif

For a practical application, I’ve been wanting to design a gazebo for the 85” wide hot tub in my backyard. I can imagine this mechanical iris being built into the dome of this gazebo. Similar to the Tree of Prosperity, I’d want the iris to reveal a light show built into the ceiling. As a Fusion360 beginner, I started 3D modeling the gazebo with the hot tub in it, using the loft function to create the tangent curves of the dome. In order to call out the dimensions of the model, you have to translate the 3D design into a 2D drawing, which Fusion360 makes it very simple to do. Modifying the properties of the dimensions are not that intuitive compared to VectorWorks.

iris-scaledrawing.PNG


FWIW, other project ideas…

A totally different approach to a portal opening into a ceiling: I came across this project titled Flux by Collectifscale, which uses LED bars on stepper motors driven by TouchDesigner.

My interpretation of this project would be to reduce 48 lines of light to just 8 bars, and suspend the entire thing on the ceiling. I did spend some time researching various stepper motors and heavy duty slip rings. Practically, I think this smaller scale version would come in handy when I do live visual sets with my musician collaborators. I’ve been meaning to put these bars on motors!

flux1.gif
litebarz.gif


Floating Lenticular Wave

This is riffing off two past projects that I’ve worked on: the mechanics of my Water Droplet Automata and the materials of the Lenticular Wave made with Aidan. I spent some time researching kinetic sculptures and came across Reuben Margolin. I thought I could create two of his kinetic sin wave caterpillars to create a structure to hold lenticular in place. I made a failed prototype with scrap lenticular, magnets, thread, nuts, a large brass ring with grommets, and a pulley. In my video, the thread I used snapped - I’ll need to get either fishing line or dacron wire to make a stronger prototype.

caterpillar.gif
waterdrop.gif


Reduce, Radiate

slices.gif

We all have been spending an exorbitant amount of hours on our own during the pandemic, a roller-coaster of emotions where self reflection is embraced, but also has potential to transform into spiraling rumination. This project is an opportunity to illuminate inner shadows, overcome, and radiate.

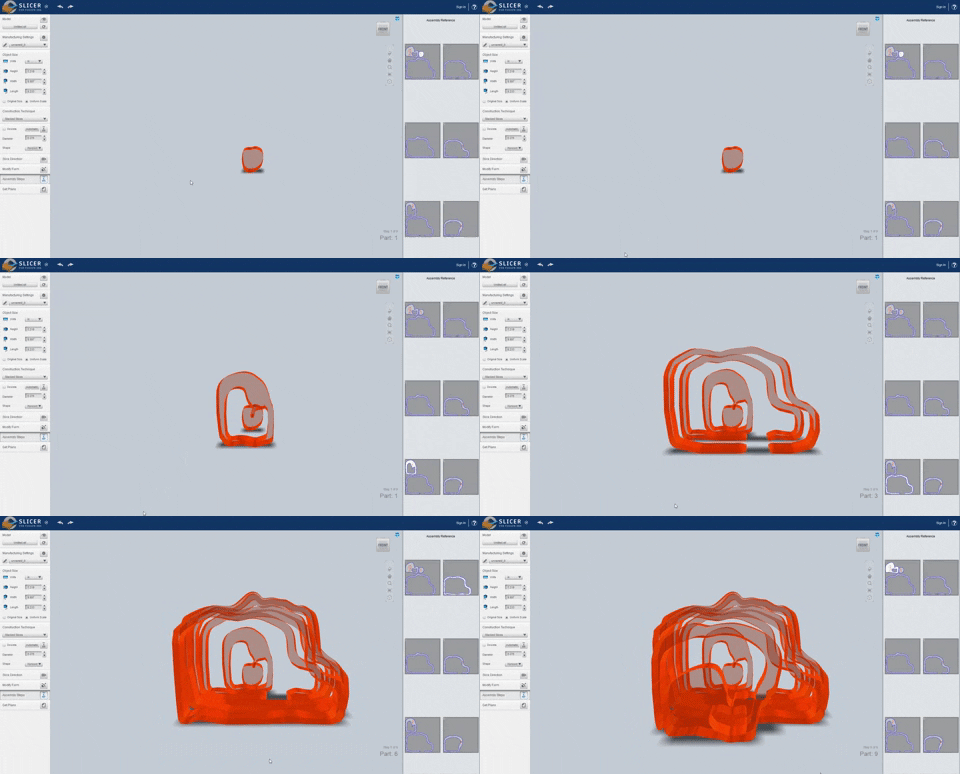
Using Slicer, I created cross sections of myself and cut out these planes out of color photo gels with the Cameo 4.

IMG_9859.JPG
IMG_9863.jpg

Originally, I had intended this to be a project with more fabrication involved, but with limited resources and unreliable shipping, it turned out to be more of a Fusion360 exercise.

I decided to remix the essence of two past projects: 37 Hour Self Portrait and The Self is More Distant Than Any Star.

3dprint-side.gif
01-SelfDistant.jpg

Main takeaways

  • Absolutely reduce the face count in your mesh. If you intend on using Slicer, a Fusion360 plugin, it will not be able to handle complex 3D models. Both Slicer and Fusion kept crashing over and over again, and upon Googling, plenty of people experienced this issue. Forum responses from the Autocad staff member said to make sure your GPU can handle it and that you have the most updated drivers. I knew my GPU could run more GPU intensive programs, so I didn’t think this was the problem.
    I knew my model had a billion or so faces, so I ended up erasing everything from my neck down. Within the Mesh tab > Modify, there is a tool that can be used to reduce the face count. What I also didn’t realize immediately was that my imported 3D model was way larger than I thought, so check your model size with the measure tool.

  • Convert your mesh to BREP (boundary representation). In order to make any changes to the imported mesh, you will need to convert it into a solid object. To do this conversion, you have to right click the project in the component list, click “Do not capture timeline” which will then reveal the Mesh tab. Now you can right click the body and select

capturedesignhistory.PNG

  • Quads > triangles. When selecting an .obj or .stl file to import as a mesh, it may be imported as a model composed of a triangular mesh. Most editing functions within Fusion360 will only work if your model has a quad mesh, which would then need to be converted to T-Splines. I spent a lot of time trying out Extrude / Thicken / Push&Pull tools within the Solid / Surface / Form / Mesh workspaces, only for none of them to work with my triangles. To create the slices of the silhouette I imagined, I wanted to give thickness to the model of my face, which was only a surface.
    I downloaded another Autodesk app called Recap as a recommendation from this tutorial. This program does a bunch of wonderful things, but the main key feature is the ability to export your file as a Quad .OBJ. Sort of frustrating that isn’t built into Fusion360 somewhere. But since I was already using that application, I made use of their extrusion function.

  • Slicer is sooooo much fun. There’s just so many options I had decision fatigue. I exported both the stacked and folded panels. Export the .DXF package in Slicer > re-save it in Illustrator > open up file in Silhouette.

  • For the photo gels I used, it took a lot of trial and error to get the right settings for the Cameo 4. I ended up with the settings below:

cameo-winner.PNG
cameo_1.PNG