
Morphing My 3D Scan in Wrap3
Thanks Matt for another great tutorial!
I used Blender to resize and adjust my model before bringing it into Wrap3. When it was time to compute the wrapping from my model to the base mesh model, I was startled by the result: the inner parts such as the mouthbag, ear sockets, eyeballs, and nostrils should not have been morphed. I went ahead and added those polygroups to the selection, and recomputed the wrap.
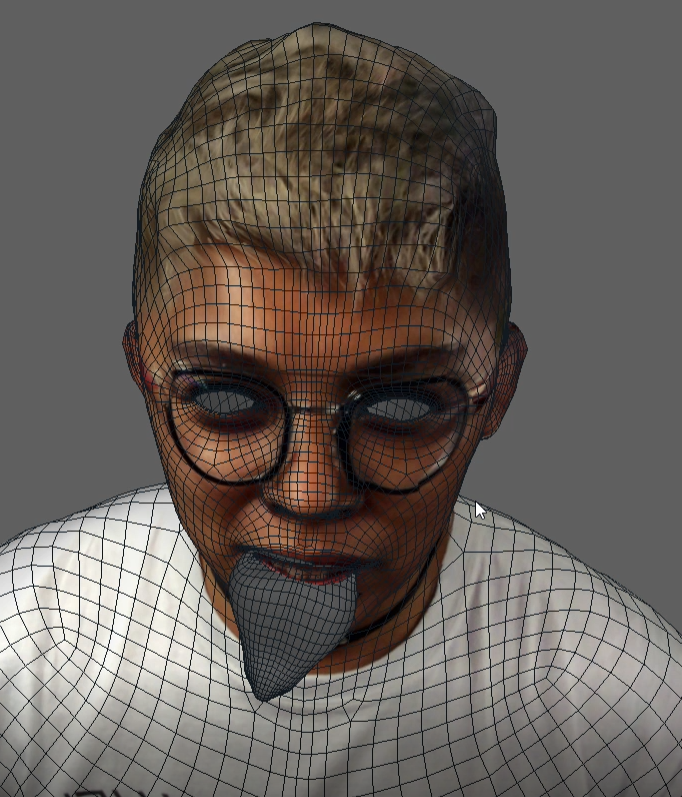
That sure fixed it. But then I realized that the female base mesh model did not include any eyes; instead, they showed up as gaping holes.
As per Matt’s suggestion, I redid the tutorial using the male base mesh model, and got my eyes back. My fingers came out looking super creepy, but I know that can be fixed at a later stage.


3D Scanning with itSeez3D
Although the 3D scanning process was pretty straightforward, I came across a few difficulties when using the itSeez3D app with the Structure Sensor + iPad.
Christina volunteered to help me with my very first scan, which ended up being the best of many attempts. I wasn’t quite ready, so the face I was making was a bit caught off guard. I initially thought that the lighting was uneven, that the left side of my face was in more of a shadow than the other side. I’m pretty happy that Christina was able to scan pretty much every detail - there’s not too many holes in my texture!
A little later that same day, I asked Dina if she could scan me so I could have an avatar with a neutral face. Even though we were in the same location with the same amount of lighting as the first scan, the scans ended up being very inconsistent. Dina came across alignment issues, and the portions that were already scanned would shift along with the body. We continued to finish and process the scan anyway, and now I see that the shifted scan resulted in multiples of my body parts. There were many more vestiges and incomplete portions in these scans. We restarted the iPad, made sure everything was charged, adjusted all the lighting in the room, and even tried the bust mode to see if that behaved differently - all to no avail.
I decided to import the first scan into Mixamo, and finally was able to live vicariously through my avatar - I’ve been missing nightlife so badly, I really just want to dance! I took advantage of all the dancing animations available.

BlendSpace1D, Animations and State Machines
This week, I followed Matt’s tutorials on BlendSpace1D, animations, and State machines.
By the second tutorial, I transformed my character Maynard’s head to be twice its size with the belly dancing animation for the upper half of the body and the running state for bottom half. I really enjoyed Maynard’s freely moving arms as they ran around with purpose.
To show the state machine animation cycle, I too had animations that required a higher velocity jump so that the joyful jump, falling, and landing animation could play out.
UNREAL: Skeletal Mesh
This week on Performative Avatars…
I followed Matt’s Skeletal Mesh tutorials and imported Mixamo animations into Unreal. I became fond of my buddy Maynard, who’s doing a little belly dance for us below.

By the end of the tutorials, I had Maynard defying gravity, running way faster than the norm, and clotheslining other dummy duplicates with the ragdoll physics left on or drifting effortlessly into space. You can also see Maynard 2.0 do a lil twerk. I left all the vestiges of the experiments as I tested all the features explained, my favorite being the imported animation that was linked with the “incorrect” earlier-made test character skeleton instead of the one that was imported along with the animation from Mixamo.
I didn’t come across too many issues when following the tutorial, but now I’m very excited to learn more about the blend space so I can compile better movement animations for my character.
Self Portrait Exercise
IMVU


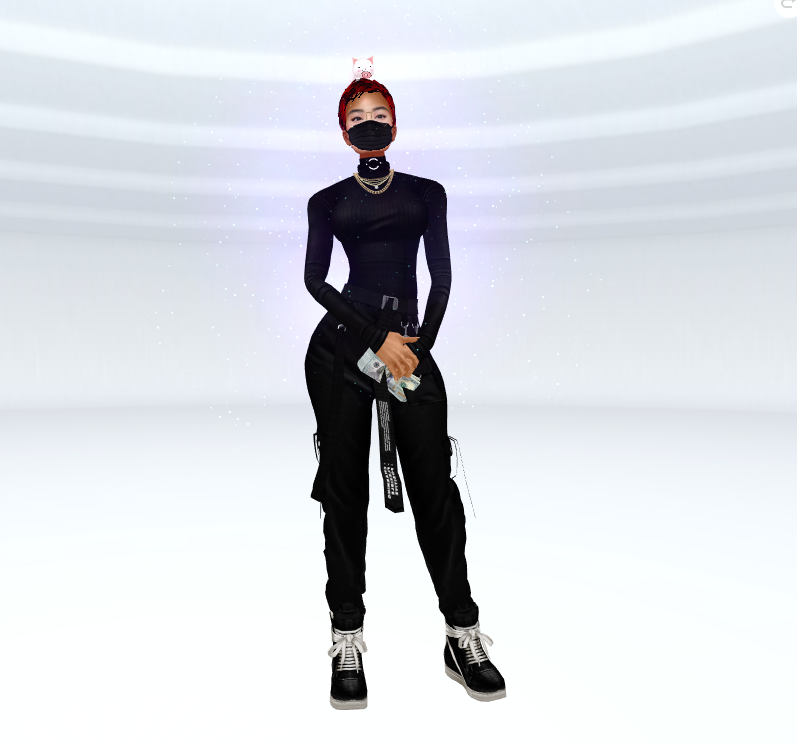


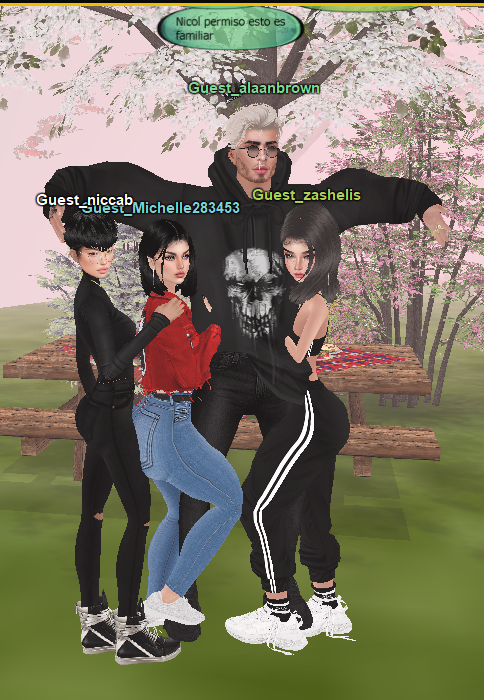

For my first avatar, I decided to use Instant Messaging Virtual Universe, or better known as IMVU, a free 3D avatar program that’s been around since the early 2000s. Over the summer, my friends Allen and Anna of Spirit Twin teamed up with Feltzine to host Spirit World, an online music festival using IMVU as their platform, and my roommate Octonomy played a set on one of the stages. That brought a whole new purpose for 3D chat worlds into my conscious as I saw festival goers blow off some steam and let loose on the dance floor.

As with many avatar creation tools, you’re asked to pick between male or female which then filters out which modifications are “appropriate” for you. Here’s the error message that shows up when you try to put on anything that isn’t designed for your specified gender.

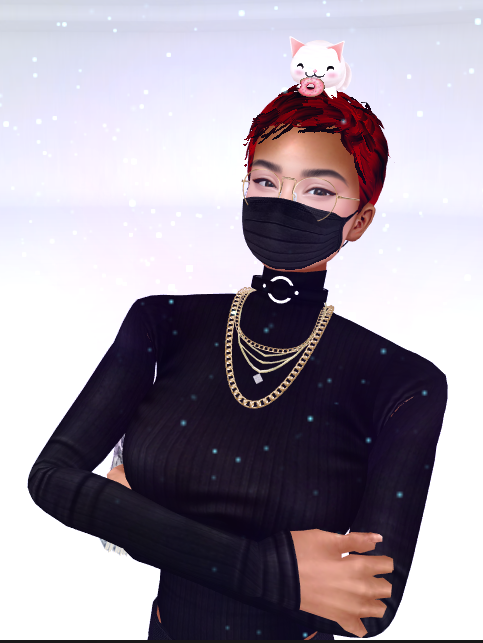
It’s slim pickins when you try to create your avatar with the default options the software offers, but you’re allotted with the 4000 credit bonus when you sign up. The available inventory in their shop is impressive - you can pick different tops, bottoms, accessories, furniture, skin, facial features, pets, special moves, and body scalers. Highly sexualized, the female body comes default with very large breasts and butt. I didn’t find the right body scaler that would reduce the size of these assets, but I’m sure there are options available. Another difficulty I had was finding the right face with Asian features. I found one that I liked, but the skin tone was paler in complexion than the rest of my avatar body.
I think if I spent more time and money in the IMVU shop, I would find a slightly thicker, more muscular body build, and a flattened chest which are the characteristics that I think are missing from my current avatar.
After using IMVU, I wanted to use a more cartoonish caricature maker that had more bubbly features and thought Animal Crossing New Horizons would fit the bill.
Animal Crossing: New Horizons

As a lot of people did over peak quarantine, I played Animal Crossing religiously and earned a lot of “bells” by selling fish, bugs, fossils, and especially turnips. The more bells you have, the more you can purchase at the Able Sister’s, the clothing store on the island. Throughout the game, you can unlock different hair styles / colors and a custom design tool where you can draw out designs for clothes and even your face. However, you can’t unlock other body modifications or facial features - you’re pretty much stuck with what’s offered in the beginning. All the characters are the same size and have the same body type no matter what gender. There are no restrictions with what clothing and accessories you can put on.