Following Tom’s intro to DMX and sACN video, I was able to successfully control the 4 DMX lights on the ITP floor using QLC+. In the video, I showcase my test of the four lights that were set up on channels 1, 21, 41, and 61.
CAMEO 4 Vinyl Cutter
Yay! The CAMEO 4 vinyl cutter safely arrived a few days ago, and I immediately opened it up to play with the latest toy.
Seems that I did not receive vinyl transfer paper, heat transfer, or any fun neon colors in my box - were there other packages sent to different people?
For my first cut, I wanted to cut out something fairly easy and especially cute - Rilakkuma, a character from Sanrio. I found this already made vinyl decal that you can order for $6+ each. I opened this image within Illustrator, used the Image Trace option, exported it as a .DXF file so that the Silhouette software
Adjusting the size of the cut
Cut preview
Ta-DA! Here’s the final result of the Rilakkuma vinyl sticker and its negative.
Lighting Moment - 04/08/2020
Lighting Moment - 03/29/2020, 1:05 AM
A rainy, contemplative Sunday through a south-facing window in Ridgewood.
With so much stillness we create stories of movement, where this temporarily seized energy has dire potential for release. The slick streets are covered in the memories of commuting rubber. Illuminated veils gently conceal the hints of our neighbors’ lives. The sky is brightly polluted by the neighborhood’s collection of street lights. Perhaps the nearby once-bustling Myrtle Ave, now silenced at this hour, is making its residual contributions to the light captured by the clouds.
The fiery glow from within the scene is coming from an aptly volcano-embellished lava lamp. Its warmth is starkly contrasted by the cold white street lights outside, seemingly amplified by all of the wet, reflective surfaces. The dual glass window panes reflect the light, resulting in an offset portrait of me. You can even see the reflection of the lava lamp in my eyeglasses. A hanging prism contains the light of the lava lamp that sits underneath it.
Lighting Moment
LOIE, A Sculptural Light Study
Inspiration
I named the piece Loie after the artist Loie Hollowell. I attended her exhibition at Pace Gallery last year titled Plumb Line. I thought to myself that her use of gradients with bold colors and geometric forms could be easily translated into washes of light.
I began to look into her other paintings, and came across The Land’s Part, a painting she did in 2017.
Loie Hollowell, The Land’s Part, 2017.
In addition to Hollowell’s paintings, I’ve always been inspired by the Art Deco movement - the patterns, the architecture, and the lighting fixtures that were being made in the 1920s.
I used to work at Remains Lighting, a bespoke lighting manufacturer that started off with antique restorations. One of my projects was to oversee the repair of these beautiful Frank Lloyd Wright stained glass sconces:
Objective
Light and Interactivity: to create a light fixture to be installed in an assigned room within the ITP floor. I chose phone booth #467, with the desire to cover the several holes that exist in the walls because of previously installed shelving.
Subtraction: use joinery to create an object. Below is a drawing of the final dog bone joint that I used to connect all of my pieces together. It took 3 tries to get the perfect tension fit, the hole ended up being a .02 offset from the key width.
Materials
3/4 plywood
Materials from the “scrap bin” at Remains
Ingersoll glass globe
Brass trapezoid + strips
Two-way mirror acrylic
Mirror Acrylic
Hue Light controller, created for Connected Devices assignment
Hue Light system
Process / Assembly
Glass globe print from Remains Lighting
Sending Temperature Readings with Raspberry Pi Zero W
Materials
RaspberryPi Zero W
Serial Breakout
TMP36 temperature sensor
Log Scale Analog Light Sensor
OLED Screen
microUSB cable
Jumper wires
Process
My original plan was to create a device that would track the amount of light in a specific phone booth. I had hopes that I could make assumptions of how the space was being used, and have the device then send Hue Light values to a lighting fixture I am working on that would be installed in said phone booth.
Setting up the raspberry Pi again was a challenge for me. I thought I properly created a backup image of the pi, but it turns out I corrupted my SD card somehow. Troubleshooting that and then acquiring a second SD card for the project took some time away from getting the pi to be actually sending sensor readings to the server.
Once it was time to get readings, the log scale analog light sensor I was using did not seem to return values that made sense to me within the pi. I then thought using the Arduino library to give me intelligible lux readings compared to the raw values would provide a decent baseline for what to expect the pi to return. I tried shining my phone’s flashlight and then covering the sensor completely to see how the values would change, but my test did not seem too fruitful.
Another day passed without sending actual data to the server, so I decided to use the TMP36 temperature sensor that Tom uses in his example. I wanted to use the humidity sensor also in the example, however the shop did not have any for rent.
I tried to get the OLED screen to work, but it kept on returning errors. I plan on continuing to troubleshoot this, but I decided that posting the temperature readings at the anticipated intervals should be prioritized.
Throughout the week, I received coding help from Sam, Name and Cy. Last night before I left the floor, I verified that my crontab was sending readings every 5 minutes. When I checked the readings this morning, I saw that I was sending my readings multiple times within the minute. I believe I am experiencing the same issue that Sam is having - a mixup between the .js file and crontab.
The response I received after reloading my backup image of the pi. Suspicious looking…
Unsteady readings with the Log Scale Analog Light Sensor and its Arduino library.
Not much difference between shining a flashlight vs covering the sensor completely.
Tinkering around with the screen after making sure that my script was successfully sending data to the server. In the end, I removed the OLED screen.
Odd error… my curl request did not return a complete list of transactionIDs.
Sending multiple readings per minute. Unable to make edits to the .js over SSH.
Skill Builder: Joinery
Ahhh… such a satisfying feeling.
This week, I wanted to create a miter joint inspired by Rick Powell’s design that was showed to us in class.
Rick Powell’s miter joint
I feel that my biggest and perhaps silly set back in this skill builder was within my Vectorworks drawing. When using the paint bucket 2D polygon tool, I didn’t realize it was creating a duplicate of the object it was forming. I kept bringing it to Mastercam and thinking to myself, I SWEAR this is a solid object! I talked out my frustrations with Julian and Aidan, and rechecked my drawing to find multiples of the shapes underneath each other.
Another lesson I reinforced was the tool path order. In my first run of the donut piece,
Skill Builder: CNC
Lighting Moment: 24 Hour Time Lapse
Setting up a Raspberry Pi Zero W
I decided to try setting up a Raspberry Pi Zero W from the shop.
Materials
Raspberry Pi Zero W
64 GB microSD card
SparkFun Serial Basic Breakout - CH340G
5V, 2A power adapter
Two micro USB cords
Jumper cables
I hit a few roadblocks along the way because I couldn’t reach the login screen in both CoolTerm and Terminal. Did I incorrectly edit the config.txt file? Or perhaps it was an error in the way I installed the USB to Serial drivers? I verified that it was installed and working correctly by following this SparkFun guide for the CH340G.
I asked Arnab to verify my setup - of course it helps to have a second set of eyes. Turned out that the 5V power adapter that I borrowed from the shop was 1.5A, and not 2A. This resulted in the following error to appear in CoolTerm:
I switched out the power adapter and finally got to the login screen. This is how it looks within CoolTerm:
I successfully changed the password, but then I tried to access the other options via the raspi-config screen. In CoolTerm, there were several scrambled ASCII letters, but I could not change how this was viewed to resemble closer how it would in Terminal. I wanted to select Network Options which appeared to be the second option, but it would always return the prompt to change the password despite whatever I entered.
After this, I thought I’d try connecting via ethernet-over-USB another shot. I realized the first time I tried this and could not get the login screen to show, I still had the microUSB connected to the Serial breakout, along with the external 5V power source. I removed all connections except the one to the USB connector, typed in “ssh pi@raspberrypi.local” then “sudo raspi-config” and got to the config menu successfully. I proceeded with the rest of the instructions:
HUMAN NATURE, Performance 1
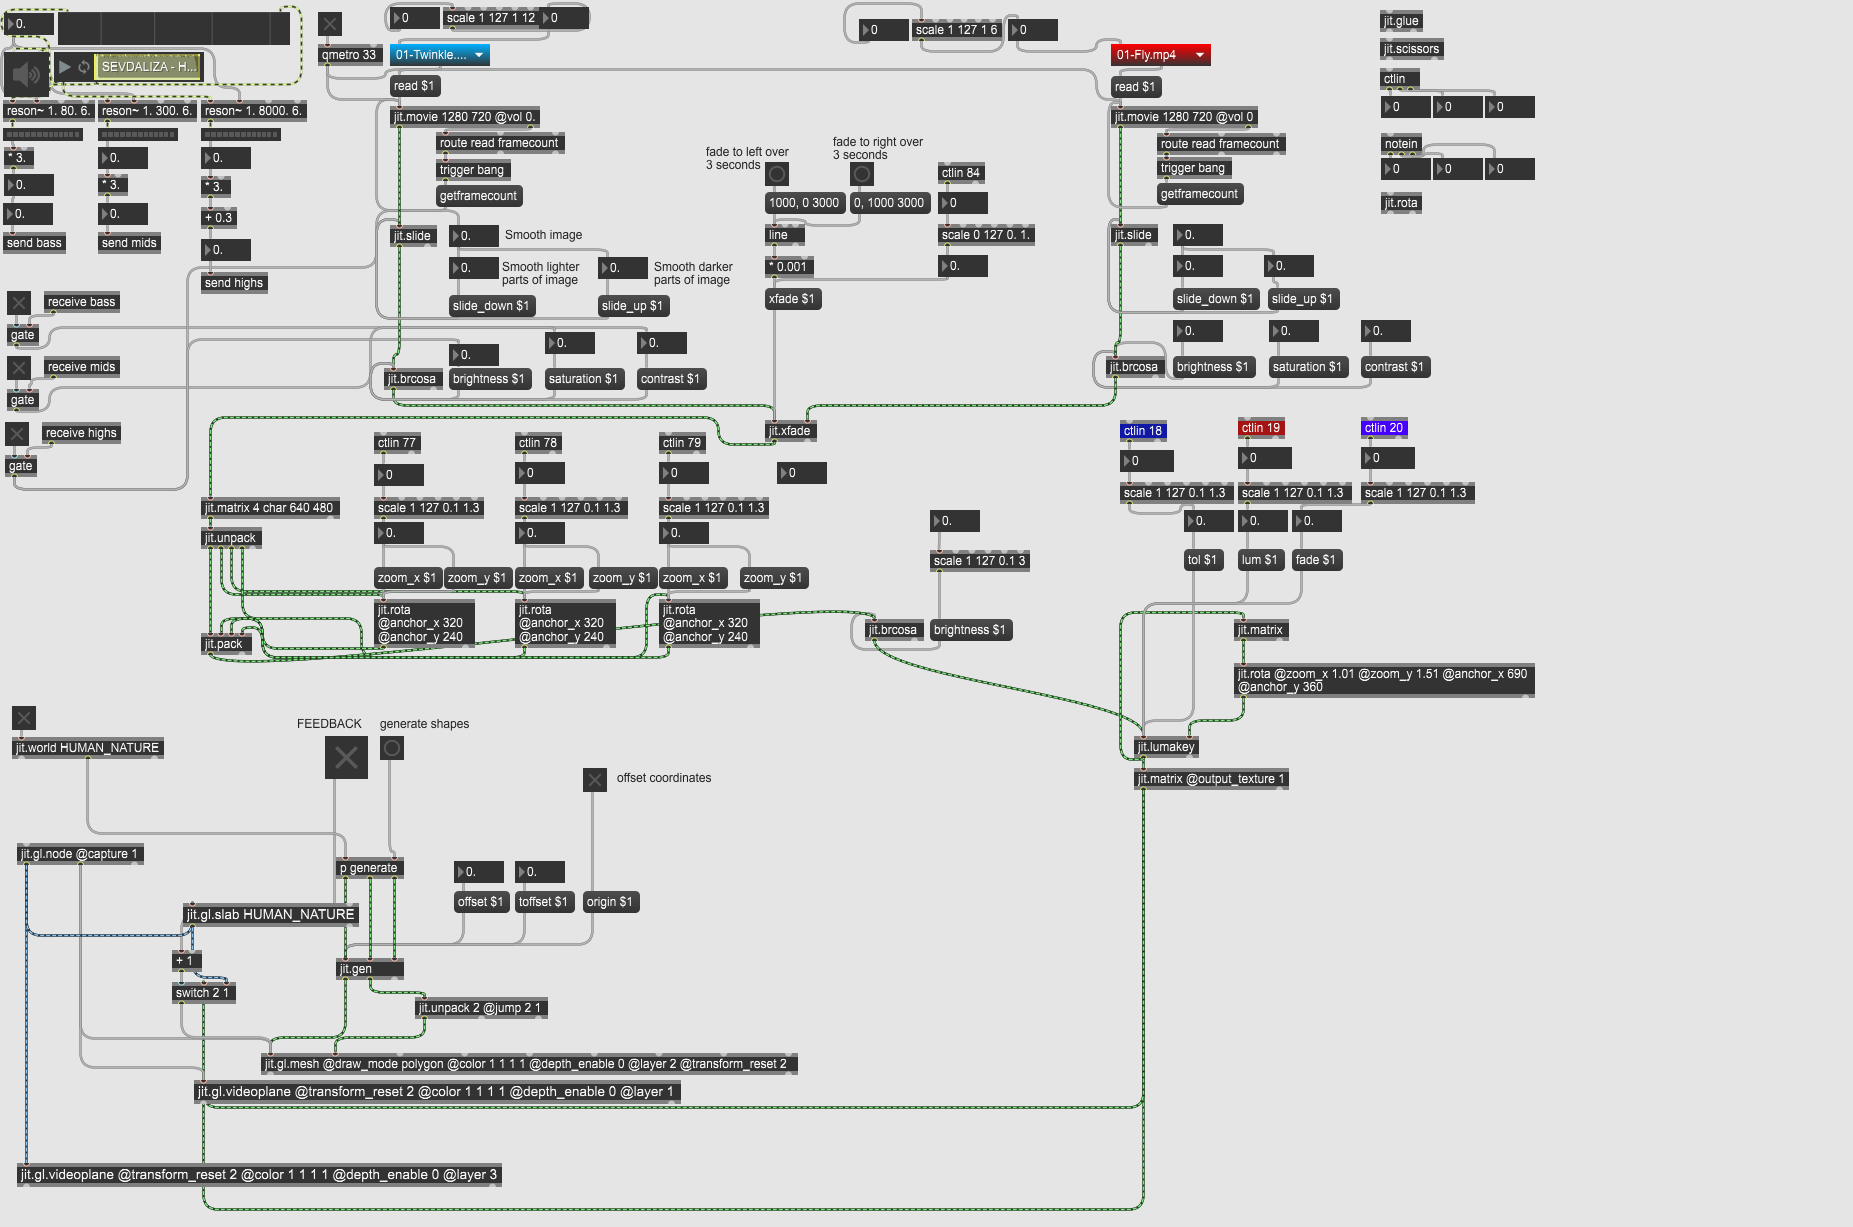
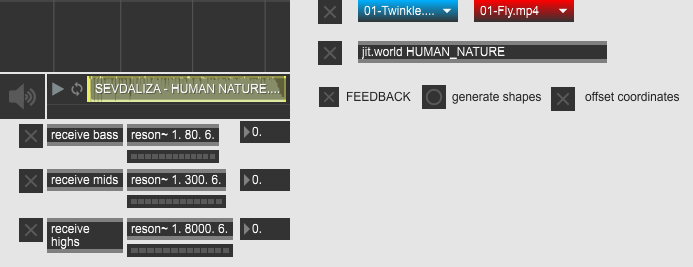
I spent the last three weeks listening to Sevdaliza’s “Human Nature” to become as intimate as possible with the piercing shrills and elongated spaces of the song. I tried to picture what the performance might look like when mapped to the song - shown on the right is my initial thought process of how I might abstract my video banks with MaxMSPJitter.
https://github.com/niccab/LIPP/blob/master/HUMANNATURE_wOffset_bri.maxpat
For the live performance, I knew I wanted to use the Novation Launch Control XL MIDI controller pad. For a quick tutorial, I referenced this video.
I also explored jit.gl.mesh: https://cycling74.com/tutorials/my-favorite-object-jit%C2%B7gl%C2%B7mesh-1
Lighting Moment: 4 hour Time Lapse
The first time lapse I took was observing the light coming in from my partner’s kitchen windows. This was taken from roughly 4am - 5:30am - unfortunately, the GoPro (at full battery!) died within 1.5 hours. With the GoPro Hero 4, there is an option to use the Night Lapse mode, which adjusts its shutter speed to allow as much light into the camera. In retrospect, I should have kept a standard shutter speed to observe the natural changes without the camera compensating for the amount of light coming into the sensor.
I imagined that the pink over the stove light would slowly fade as the radiant morning light flooded into the kitchen as it typically does. There are quick flashes of the lights from passing vehicles, and slight glimpses into the neighbors’ morning activity.
The second time lapse I took was from roughly 1:30pm to 6:30pm. I set up the GoPro by the window facing southwest towards Willoughby St. With the darkened, gloomy sky, I did not observe dramatic light changes. As the sun went down, the reflections of the windows became more apparent, so it was possible to observe the light coming in from the ITP floor in the same shot as the buildings outside.
Hue Light: Cassette Controller
I transformed an old cassette tape from a thrift store into a Hue Light controller. I embedded a rotary encoder and a push button through the cassette spools, and an OLED screen through which you would see the tape. I included a red LED at the bottom of the cassette to confirm the WiFi connection.
Materials
Hue Light system
Arduino NANO 33 IoT
Rotary encoder
Push button
OLED Screen
Cassette Tape from thrift store
Code
My code can be found on my Github here.
I modified Tom’s “HueBlinkWithJsonEncoder.ino” file, which can be found here.
Because my controller has an OLED screen, I put together a unit test so that I could adjust the sizing and positioning of the text.
The screen will show when it is attempting to connect, when it finally makes the connection, what settings / values are being changed, when the request is sent, and the response code.
I made sure to modify the default “on” state to “true”, brightness to 255, hue to 0 (red), and saturation to 255.
I increased the stepping for the hue values so that picking another color would be quicker.
Assembly
The Other Mill
This week, I used the OtherMill Pro to carve out my partner’s signature in steel.
Materials
scrap steel
1/8” flat end mill
1/16” flat end mill
Process
My partner had sent me an illustrator file with her signature on it, and I thought it would make a pretty neat Valentine’s Day gift if I could carve something out for her. Originally, I had brought a piece of brass in, but it was not a truly flat piece. I then found a piece of steel that I thought would work for this project.
Because of the way the signature tapers at the end of certain letters, I had to scale up the drawing and use only her first name so that I could begin the job. I asked David Rios if I could borrow his 1/16” FEM for the thinner ends.
I made sure to clean the surface of the spoilboard with acetone before beginning the job. The project started with the 1/16” bit for a few seconds, and then 1/8” for the rest of the job.
Video Playback System
I began to work on my video playback system by further exploring the technique discussed in class where the frame is updated every 2 seconds, resulting in a delayed color trail. I wanted to see how my sample bank of nature videos would look with this effect.
The next step for me was to decide on a few songs that would complement this mood of rustling dead flora and sleepy koi. For now, I feel my nature videos can start a relationship with the song “Human Nature” by Sevdaliza.
Sevdaliza provides rich resonating vocals that exist in this ever-elongating space, as if you’re slowly twisting and sinking willingly into the ocean depths. The mood is somber and contemplative with cinematic instrumentals.
In what ways can I achieve such decadent expansion with Max?
I see this manifesting in slow cross fading videos, bits and pieces creeping into the frame. I implemented the jit.xfade object, and watched my on board GPU struggle to keep up with a steady frame rate.
I feel like the song excretes tears of gold, dripping abundantly on luscious leaves. I want to be able to zoom slowly in and out of videos in particular spots of the frame as if the viewer is grabbing the scenery in their own hands. I referenced this forum thread for help with zooming in and out with sound.
There are specific lyrics that pinch and screech in the second verse, and I imagine climaxes of white, but somehow with distinguishable elements.
Week 2: Candle
Objective
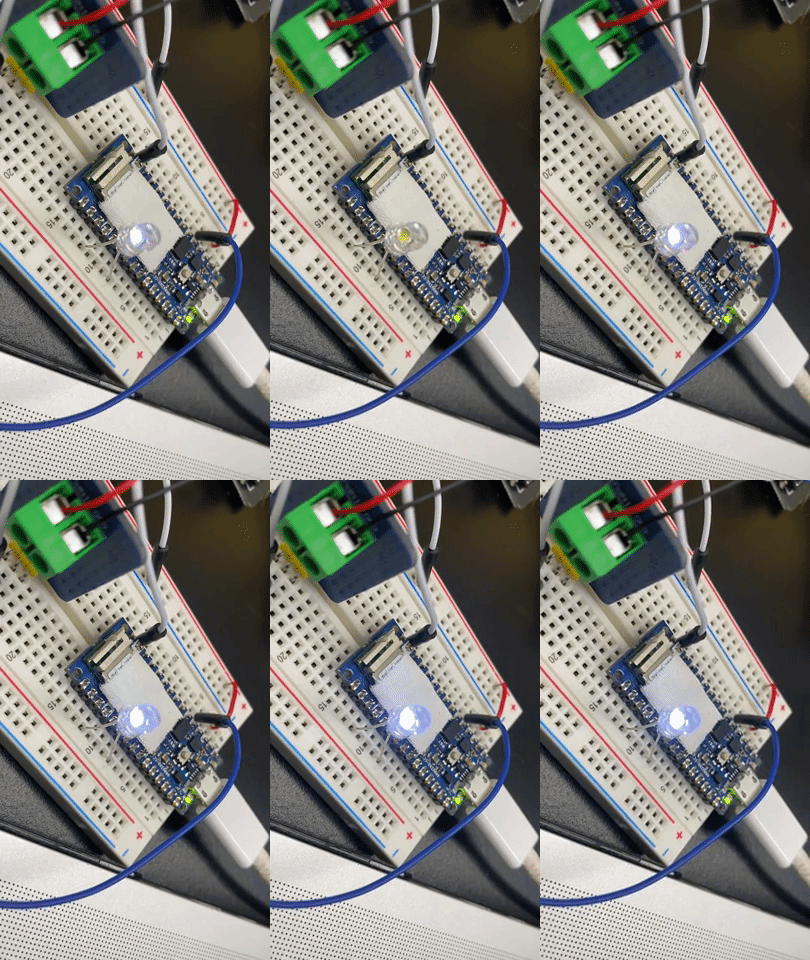
Create an artificial candle or lantern using a NeoPixel jewel or other programmable LED. Your candle should include a base and a shade or diffuser. Try to capture the colors and behavior of a real candle in programming your candle.
Materials
(2) Fluorescent green acrylic rods, 1’ L x1/4” D - Canal Plastics
(2) Clear acrylic rods, 1’ L x 1/4” D - Canal Plastics
1/4” white acrylic - Canal Plastics
Neopixel Jewel
Arduino NANO 33 IOT
Enclosure Fabrication
I started fabricating the enclosure for the Neopixel because I wanted to adjust the color of my LED candle to take the fluorescent green acrylic rods into account.
I lasercut out two circles that would hold the weaving acrylic rods in place to simulate the look of fluted glass.
I trimmed the acrylic rods into 16 pieces using the bandsaw, and used a rubber mallet to hammer them into the circle.
Code
I observed three sketches: NeoPixelSimple (red pixel one at a time) NeoPixelCandle0001.ino (red to orange) and WS281xCandle.ino (flicker) before attempting to make any changes.
I referenced the Neopixel color chart to determine the color range I wanted my candle to fall within.
At first, I thought that the green acrylic rods with very saturated yellow tones would benefit from LEDs that were less saturated and in a deeper red tone range. I changed the hue color range to 1000 to 2000, saturation 50-100, and intensity from 10-100. This resulted in an even more artificial pink orange that did not resemble the flame.
I then tested out more saturated yellows, which resulted in highlighting the green acrylic even more in an undesirable way.
Finally, I settled on a range where the candle initializes within the ranges H: 4000 - 5000, S: 230-255, I: 200-255. Looking at the enclosure straight on, there is still more artificial green that I am not sure can be avoided due to the materiality of the acrylic rod choice. However, looking at the ambient glow of the light on a white piece of paper resembled closer to the warmth of an actual flame. Here is a link to the code.
Helpful Resources
Week 1: Fading Curve
Hue Light: Interface
This week, I was able to successfully control the Hue Lights that were set up on the ITP floor using Terminal. Here is a video turning the Hue lamp on and off with the following Terminal commands:
On:
curl -X PUT -d'{"on": true, "hue":42900, "effect": "colorloop"}' http://172.22.151.181/api/YQWwzjYDMcgI4WlYHbl-ITkV2F17nXqcjkWusDMy/lights/1/state
Off:
curl -X PUT -d'{"on": false}' http://172.22.151.181/api/YQWwzjYDMcgI4WlYHbl-ITkV2F17nXqcjkWusDMy/lights/1/state
After successfully using Terminal to control the Hue lamps, I attempted both Arduino and p5js to make changes.
I used the Arduino HTTP client example sketch, but was unable to turn the Hue light on and off. The Serial monitor only showed that the Arduino was attempting to connect to sandbox370, but did not complete the connection.
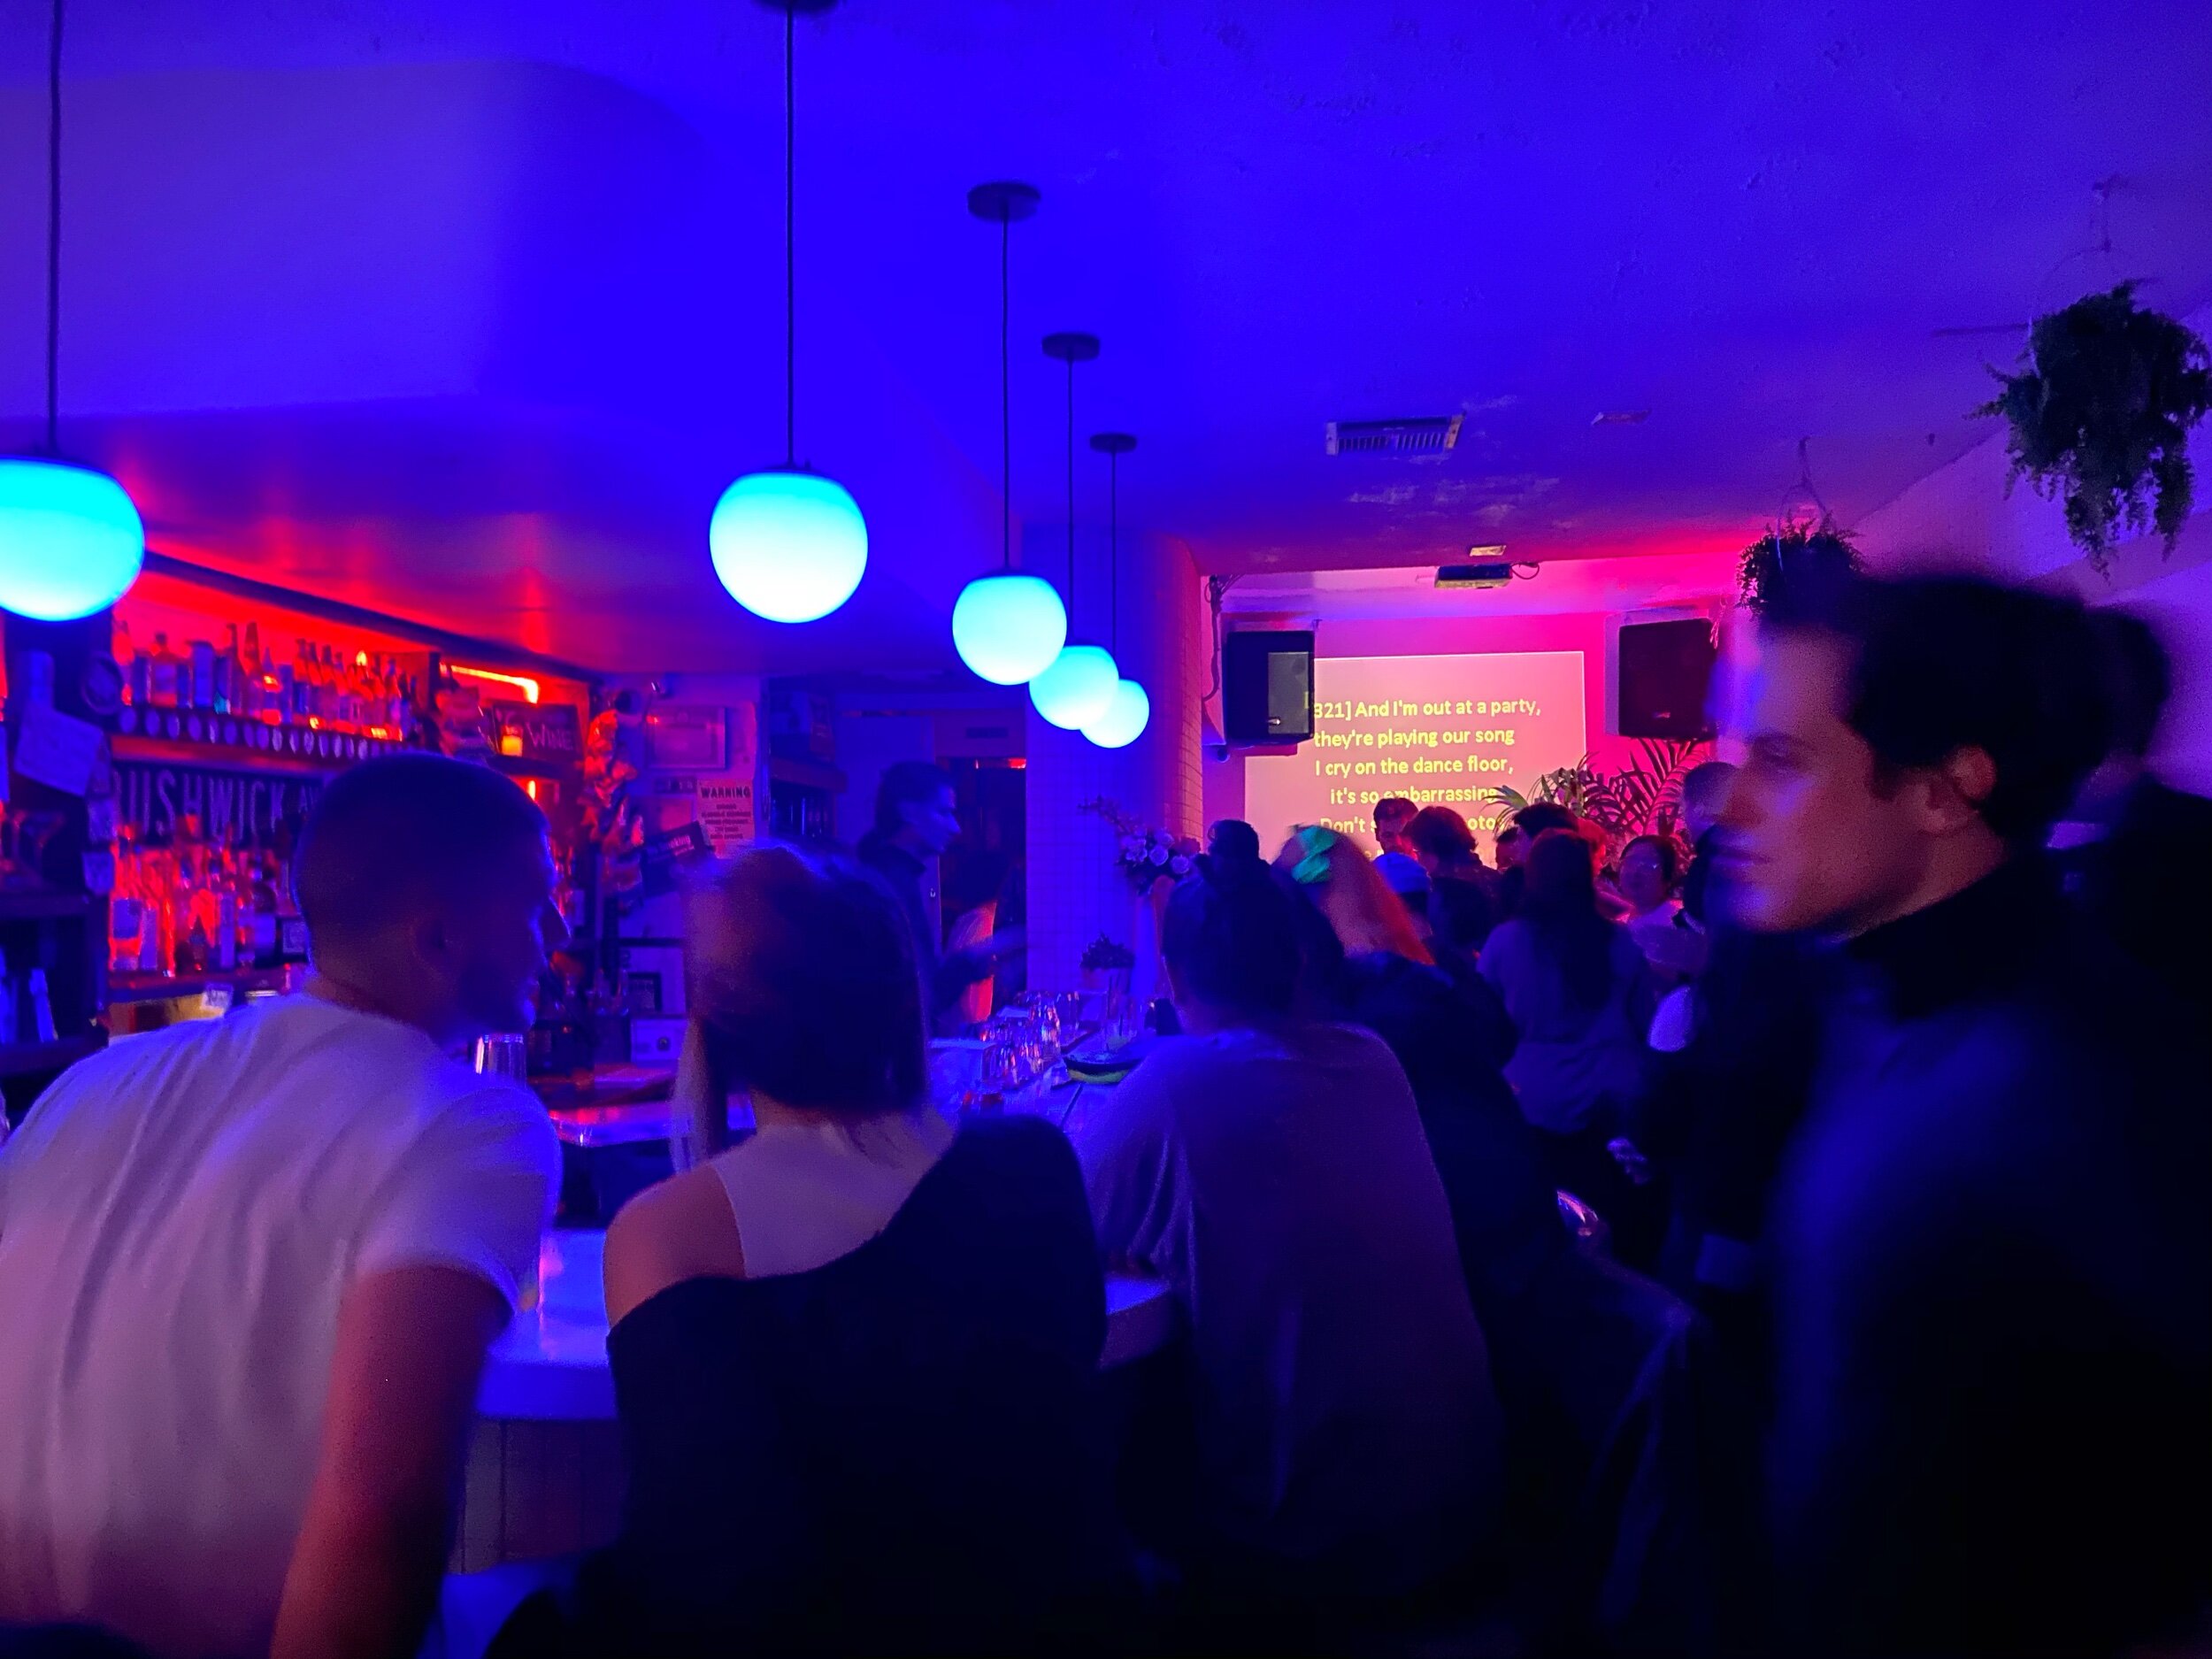
Week 2: Lighting Moment
11:53pm, Rebecca’s on a rainy Thursday Night Out. There are several lighting moments within this composition. The striking glow from two neon signs in the window exhibit a range of colors: the middle is a dominantly yellow sign that reads MIXED DRINKS with a white border, while the other is a vintage Rollerblade sign. The white semi-sheer curtain diffuses the glow but allows light to seep into the bar’s ambience. The jukebox screams to be touched with a fluorescent yellow coming from the song selections and teal blue accents. The walls are a wash of indigo as a result of the bar pendant Hue lamps. In the upper left corner is the red of the EXIT sign mixing with the indigo creating a soft puddle of fuschia. Through the entrance, the wet streets offer reflective surfaces for the headlights of incoming traffic along Bushwick Ave.


